In summary:
- Ski stiffness isn’t a single number but part of a “kinetic chain” from your foot to the snow.
- Proper boot alignment is non-negotiable; it’s the foundation for efficient force transfer and knee health.
- Stiffness must match your ability, weight, and primary terrain (powder vs. ice). A mismatch leads to fatigue or loss of control.
- Bindings are a critical safety system; their settings must account for the torque a stiff ski can generate.
- Progress to stiffer gear gradually, allowing your body and technique to adapt to the increased mechanical load.
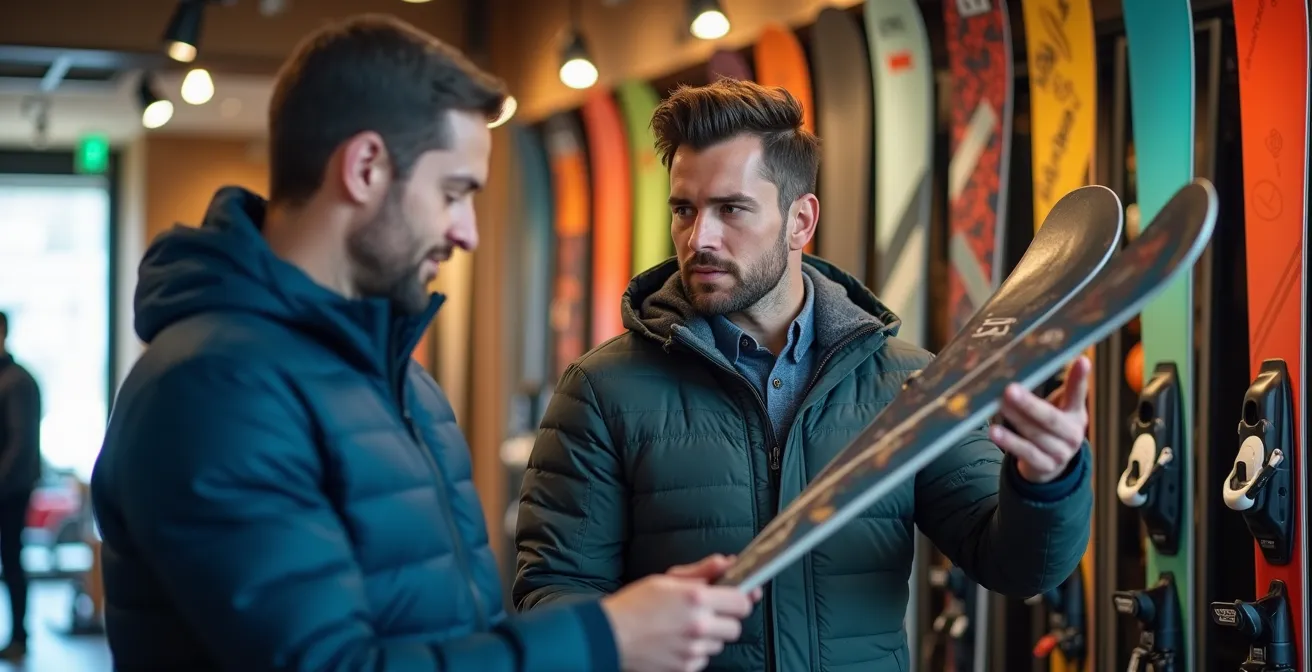
If you’re an intermediate skier ready to leave rental gear behind, the world of equipment opens up, and with it, a sea of confusion. The most common question we hear in the shop revolves around one specific metric: stiffness. You’ve likely heard the basic advice—heavier, more aggressive skiers need stiffer skis, while lighter, less experienced skiers need softer ones. While not wrong, this advice barely scratches the surface. It treats stiffness as a simple dial, ignoring the complex system it’s part of.
The real key to unlocking performance and comfort isn’t just picking the right “flex number.” It’s about understanding how your entire setup functions as a single, interconnected system—a kinetic chain of force that runs from your brain, through your body, into your boots, and finally, down to the ski’s edge gripping the snow. A breakdown anywhere in that chain, whether from poor boot alignment or an incorrectly tuned edge, compromises everything. The stiffness of your skis and boots is what dictates the speed and power of that force transmission.
But what if the secret wasn’t in the stiffness itself, but in how all the components work together? This guide moves beyond the generic charts. We’ll break down each link in the kinetic chain, from the biomechanics of knee pain to the physics of edge grip on ice. By understanding the whole system, you can make an informed decision that elevates your skiing instead of holding you back, ensuring your next pair of skis is a true upgrade, not just a different color.
This article provides a comprehensive look at the interconnected mechanics of ski equipment. The following table of contents outlines each critical component we will explore to help you master your gear from the inside out.
Contents: A System-Wide Look at Ski Performance
- Why improper boot alignment causes chronic knee pain?
- How to sharpen ski edges at home for ice grip?
- Rocker vs Camber: which handles powder better for beginners?
- The binding setting error that fails to release during a fall
- When to buy gear to get 40% off last season’s models?
- Stiff Boots vs Trail Runners: which prevents fatigue on rocky terrain?
- Why impact walking prevents osteoporosis better than swimming?
- How to start cold showers without shocking your system?
Why improper boot alignment causes chronic knee pain?
Before we even talk about skis, we must start with the foundation of your kinetic chain: your feet and boots. Chronic knee pain after a day on the slopes is often blamed on “bad knees” or fatigue, but the root cause is frequently mechanical and starts in the boot. Proper alignment ensures that the force you generate is transferred cleanly through your ankle, knee, and hip. When your boot is misaligned (for example, causing your foot to pronate or supinate), it creates a break in this chain.
Think of it like trying to drive a screw with a bent screwdriver. The energy is dispersed inefficiently, and a tremendous amount of rotational stress is placed on the first available joint that can twist: your knee. Stiff ski boots are designed to restrict ankle motion to provide precise control. This is great for performance, but it means they transfer these rotational forces directly upward into the knee joint. When your ankle can’t flex and absorb these micro-adjustments naturally, your ligaments and cartilage take the punishment with every single turn. This is why getting your alignment dialed in by a professional boot fitter isn’t a luxury; it’s a necessity for both performance and long-term joint health. In fact, user feedback shows that up to 99% of users report reduced knee pain once their equipment alignment is corrected.
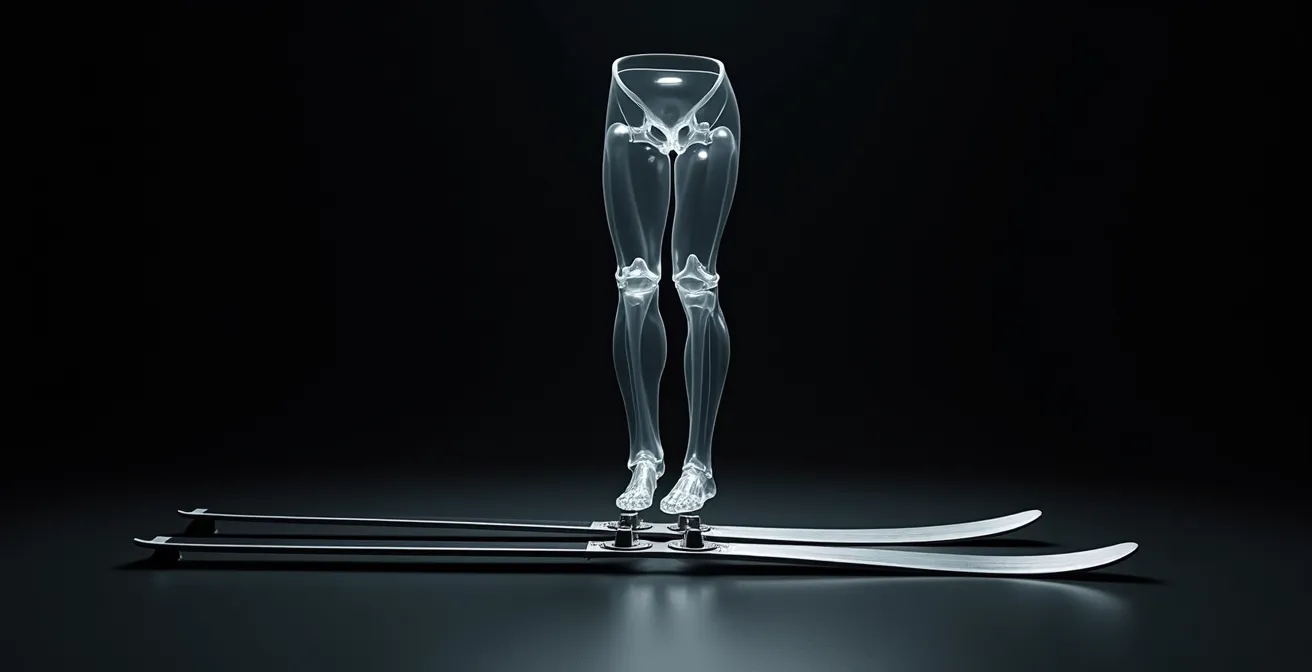
As the diagram above illustrates, any deviation at the base multiplies the unwanted torque applied to the knee. A stiff ski acts as a long lever, amplifying these alignment errors. A softer, more forgiving ski might mask the problem by flexing and absorbing some of that aberrant force, but a stiff, responsive ski will transmit it without mercy. Correcting this with custom footbeds and cuff adjustments is the single most important investment you can make in your skiing.
How to sharpen ski edges at home for ice grip?
If the boot is the foundation of the kinetic chain, the ski edge is the final point of contact where all your energy and intent are delivered to the snow. On a day with soft, grippy snow, a dull edge might go unnoticed. On ice, however, a poorly maintained edge is a critical failure point. The stiffness of your ski directly influences how you should approach edge tuning, especially for hardpack conditions. A stiffer ski has higher torsional rigidity, meaning it resists twisting forces. This allows it to hold an edge with immense power, but it also means the edge angle must be precise.
For home tuning, you need a file guide, a file, and a series of diamond stones for polishing. The side edge angle is what provides the grip in a turn. For most intermediate to advanced skiers on firm snow, expert tuning guides recommend an 87° or 88° side edge angle for optimal grip. A softer ski flexes more under pressure, so a slightly more aggressive angle (like 87°) can help it bite. Conversely, a very stiff ski might feel “hooky” or overly aggressive with such a sharp angle, so an 88° or even 89° angle might provide a smoother entry into the turn while still offering plenty of hold, thanks to its inherent stability.
The base bevel (the angle on the bottom of the edge) should be set between 0.5° and 1° for most all-mountain skiing. This slight lift prevents the ski from feeling “grabby” and helps initiate turns smoothly. After setting your angles with a file, you must polish the edge with progressively finer diamond stones (e.g., 400, 600, 1000 grit) to remove burrs and create a razor-sharp, smooth finish. A polished edge is not just sharper; it’s more durable and predictable on ice.
Rocker vs Camber: which handles powder better for beginners?
A ski’s stiffness doesn’t exist in a vacuum; it works in tandem with its profile, or shape. The two primary profiles are camber (a traditional upward arc in the middle of the ski) and rocker (a reverse-camber or “banana” shape). For a beginner or intermediate skier venturing into powder, the combination of profile and flex is critical for an enjoyable experience. The goal in powder is float, and a rockered profile is the clear winner here. The upturned tip and tail naturally rise above the snow, requiring far less effort from the skier.
However, stiffness complicates the equation. As the Renoun Ski Design Team notes, “Powder skis: Softer in the tip for float, but often stiffer underfoot for stability.” A fully rockered ski with a very soft flex will be incredibly easy to pivot and surf in deep snow, making it forgiving for a beginner. But, it can feel unstable and “flappy” on harder snow or at higher speeds. A stiffer rockered ski, on the other hand, provides a powerful, stable platform for charging through variable powder but can be demanding and unforgiving if your technique isn’t centered and aggressive.
The table below breaks down how these combinations perform, especially for someone new to soft snow.
| Profile Type | Flex Pattern | Beginner Suitability | Powder Performance |
|---|---|---|---|
| Rockered + Soft Flex | Easy to bend | Excellent – Forgiving | Effortless float, can feel unstable |
| Rockered + Stiff Flex | Requires force | Poor – Demanding | Powerful surf-like turns |
| Camber + Soft Flex | Traditional feel | Good – Predictable | Requires more effort to float |
For an intermediate skier looking to build confidence in powder, a ski with a rockered tip and tail but with camber underfoot, combined with a medium-soft flex, often provides the best of both worlds: easy floatation initiation from the rocker and some stability and edge hold on groomed runs from the camber.
The binding setting error that fails to release during a fall
The ski binding is the most critical piece of safety equipment in the entire kinetic chain. Its job is to be an intelligent release valve, holding you securely to the ski when you’re carving, but letting go predictably during a fall to prevent injury. Your DIN setting—a number based on your height, weight, age, and ability—determines the force required for release. However, ski stiffness introduces a variable that many skiers overlook: torque. A common and dangerous error is setting a DIN that is technically correct for your stats but fails to account for the leverage of a stiff ski.
Stiffer skis do not absorb energy in the same way softer skis do. In a twisting fall, a soft ski might flex and absorb some of the rotational energy before the binding needs to release. A stiff ski, however, acts like a rigid crowbar attached to your leg. As ski performance analysis reveals, stiff skis can ‘snap back’ during a fall, creating sudden, high-torque twisting forces that the binding’s release mechanism might not interpret correctly or quickly enough. This is especially true in slow, awkward falls where the force applied is a sustained twist rather than a sharp impact.
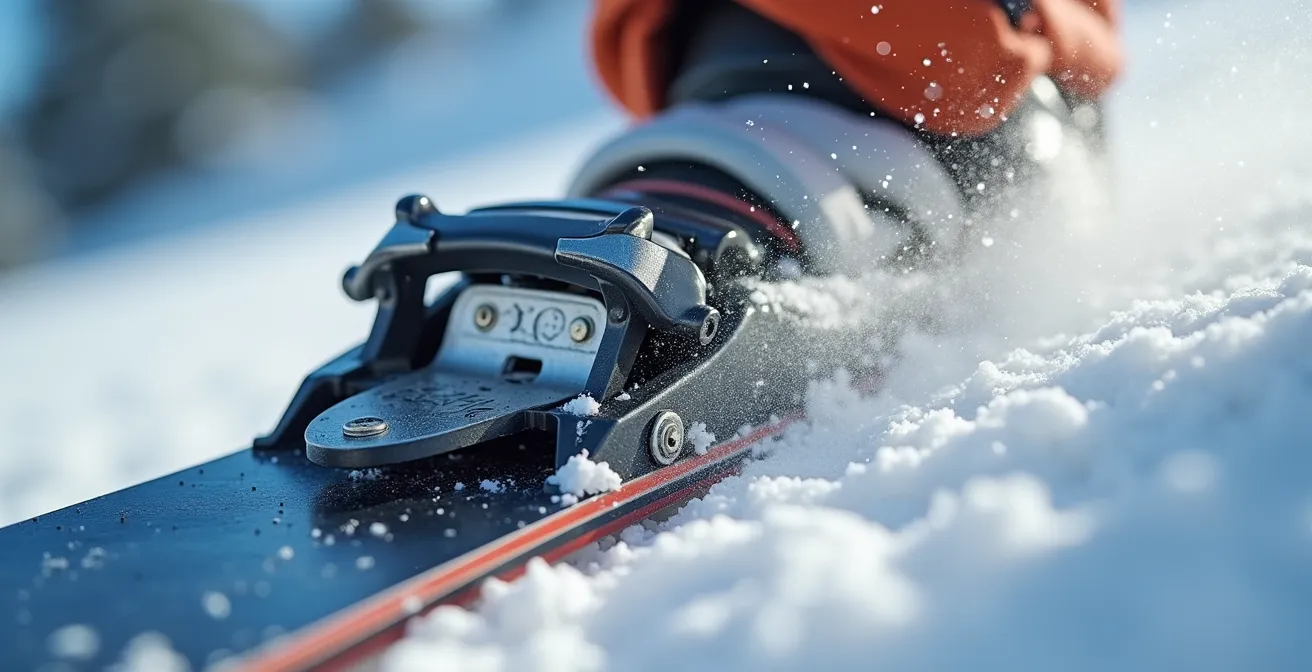
The mechanism is designed to release under specific force vectors. A stiff ski can introduce complex, off-axis loads that can delay or prevent a clean release. Therefore, when moving to a significantly stiffer ski, it’s wise to have your DIN settings checked by a certified technician. They may recommend a setting that is slightly more conservative to account for this increased leverage, especially if you are skiing in variable or heavy snow where falls are more common. Never adjust your own DIN settings without proper training; it is the critical failure point for your entire safety system.
When to buy gear to get 40% off last season’s models?
The allure of an end-of-season sale is strong. Seeing last season’s top-of-the-line, stiff, powerful skis at a 40% discount can be tempting. But buying based on price alone is the fastest way to sabotage your progression. The right time to buy is when you have done your homework and know exactly what you need. A discounted ski that is too stiff for you is not a bargain; it’s a waste of money that will lead to frustration, fatigue, and poor technique.
Before you even look at sales, you need a clear picture of your personal stiffness requirements. As the experts at Wagner Custom Skis state, “At Wagner Custom, our ski designers take all of your factors—height, weight, skiing ability, skiing style, terrain preferences—into consideration to determine your perfect flex.” While you may not be buying custom skis, you should adopt the same methodical approach. A ski that is 10-15% too stiff can feel like a plank of wood, refusing to bend into a clean arc and punishing every small mistake. It will force you into the backseat and ruin your form.
To avoid this trap, you need a pre-purchase audit plan. This ensures you’re driven by your needs, not by the discount sticker.
Your Pre-Purchase Stiffness Audit Plan
- List your vitals: Write down your exact weight, height, honest ability level (e.g., confident on all blues, hesitant on black diamonds), and the terrain you ski 80% of the time (e.g., groomed runs, trees, moguls).
- Inventory your current setup: Identify your current or most recent rental skis. Note their length and any performance issues you had (e.g., “unstable at speed,” “hard to turn in bumps”).
- Establish a baseline: Use your vitals to consult several manufacturer’s sizing and stiffness charts online. This will give you a baseline flex range to consider (e.g., boots from 90-110, skis with one layer of metal).
- Investigate the “deal”: When you see a sale model, research what changed for the new season. Was it just the topsheet graphic (cosmetic), or did they change the core materials or construction (structural)? A cosmetic change means you’re getting the same ski for less.
- Define your target and stick to it: Based on your research, define your ideal stiffness target. Commit to walking away from any “amazing deal” on a ski that is significantly stiffer or softer than this target.
Stiff Boots vs Trail Runners: which prevents fatigue on rocky terrain?
To better understand the role of stiffness in your ski setup, let’s draw an analogy from a different sport: hiking on rocky terrain. Would you choose a flexible, minimalist trail runner or a stiff, supportive hiking boot to prevent fatigue? The answer depends on the task. The trail runner is light and requires less energy for each step, but every rock and root is felt directly, forcing the small muscles in your feet and ankles to work constantly to stabilize you. The stiff boot is heavier, but it creates a rigid platform, shielding your foot from the terrain and transferring the load to the larger muscle groups in your legs. It’s less nimble but far more efficient over long distances on rough ground.
This is a perfect metaphor for soft vs. stiff skis and boots. A softer ski is like the trail runner: it’s forgiving, easy to bend, and playful at low speeds. However, it provides little energy return and poor edge hold in demanding conditions, forcing you to use more muscle to stay in control. As one analysis explains, stiffer skis require more energy to bend but reward you with stability, control, and rebound. They are the hiking boot: they demand more precise input but provide a stable platform that smooths out rough terrain and returns the energy you put into them, leading to less fatigue at the end of the day for a skilled user. For intermediate to advanced skiers, professional bootfitters recommend boot flex ratings between 100-120 for this optimal energy transfer.
Choosing a ski that’s too soft for your weight and ability is like hiking a rocky mountain in running shoes. It might feel easy for the first mile, but the cumulative instability will exhaust you. Matching the stiffness to the task is key for efficiency and endurance.
Why impact walking prevents osteoporosis better than swimming?
Let’s use one more analogy to grasp the final piece of the stiffness puzzle: mechanical load. Bone density, like skiing technique, responds to stress. High-impact activities like walking or running send small, sharp stress signals through the skeletal system, which triggers bone to remodel and become stronger. Low-impact activities like swimming are excellent for cardiovascular health but provide almost no mechanical load, so they do little to prevent osteoporosis. The *type* of force matters.
This is directly applicable to ski stiffness. A soft ski is a low-impact tool. It bends easily and absorbs vibrations, shielding you from the terrain. This makes it comfortable but also mutes the feedback from the snow. You don’t feel the subtleties of the surface, and the ski doesn’t require precise pressure to perform. A stiff ski is a high-impact tool. It transmits every detail of the snow surface directly to your feet. This can be jarring if you’re not ready for it, but it’s also a rich source of information. It forces you to be a more active and precise skier. As the Wagner Custom Skis Technical Team points out, “The flex pattern changes depending on skier weight and ability (a lightweight but powerful skier can flex a ski more deeply than a heavier novice).” A stiff ski demands that you provide the correct “impact”—the right amount of pressure at the right time—to make it work. It’s a demanding partner, but it’s one that will make you a much stronger skier by forcing you to adapt to a higher mechanical load.
A skilled skier loading a stiff ski is like a runner strengthening their bones; they are using impact productively to create a powerful, positive adaptation. Choosing a ski that is slightly more demanding can be a catalyst for improving your technique, as long as the jump in stiffness isn’t too large.
Key takeaways
- Your ski equipment is an interconnected system; a flaw in one part (like alignment) compromises the whole.
- Stiffness dictates force transmission. Too soft, and energy is lost; too stiff, and it’s unforgiving and can lead to injury.
- Progressive adaptation is key. Small, incremental increases in stiffness allow your technique and body to adjust safely.
How to start cold showers without shocking your system?
So, you’ve determined that you’re ready for a stiffer, more responsive setup. How do you make the transition without it feeling like a shock to your system? The best analogy here is learning to take cold showers. Jumping straight into ice-cold water is a brutal, unpleasant shock that most people will quit immediately. The successful approach is progressive adaptation: start with your normal warm shower, then turn the dial slightly cooler for the last 30 seconds. Over weeks, you gradually increase the duration and decrease the temperature. Your body adapts, and what was once shocking becomes invigorating.
The same exact principle applies when moving to stiffer skis. Going from a soft rental ski to a race-stock ski with two sheets of metal is a recipe for a miserable day. You will feel out of control, your legs will burn out, and your confidence will plummet. The key is to make an incremental jump. If you’re on a ski with a soft foam core, your next step might be a ski with a full wood core, or a wood core with a single, partial layer of metal. This is a manageable increase in demand. As a rule of thumb, ski instruction methodology suggests a 10% stiffness increase is the maximum safe progression increment for a single season.
The best way to manage this is through demoing. Don’t just commit to a full day on a much stiffer ski. Start with a two-hour demo. If that feels good, try a half-day next. A smart progression protocol could look like this: spend the first few runs on a ski that is about 10% stiffer than your current setup, focusing only on staying centered and making clean, round turns. If you find yourself constantly in the “backseat,” or if the skis feel chattery and unstable, they are likely too stiff for your current technique. Listen to that feedback. Progression is a marathon, not a sprint. A small, successful step up is far better than a large, painful leap that ends in failure.
Ultimately, choosing the right ski is a process of honest self-assessment and understanding the mechanics of your gear. The next logical step is to take this knowledge and apply it. Start by having your alignment and current setup evaluated by a professional to get a true baseline before making any purchasing decisions.